Sign Up and Contact Us->[email protected]
Here you’ll find the complete process for getting started with Email. This section describes the steps to register your domain, and how to insert records to the DNS and register the sender. Our goal is to deliver all emails that you send to your targeted inboxes. For the best chance of the successful delivery of your emails, follow this guide to ensure the best results.
Register a Domain
To use fully-featured email, you need to register your company's domain. This step is necessary to confirm ownership of the user accounts and so enable you to send emails from any email address within that domain.
To verify your domain, you need the Domain Name System (DNS) records to apply to your hosting provider. It is possible to obtain your DNS records in the web interface.
Add your sender domain
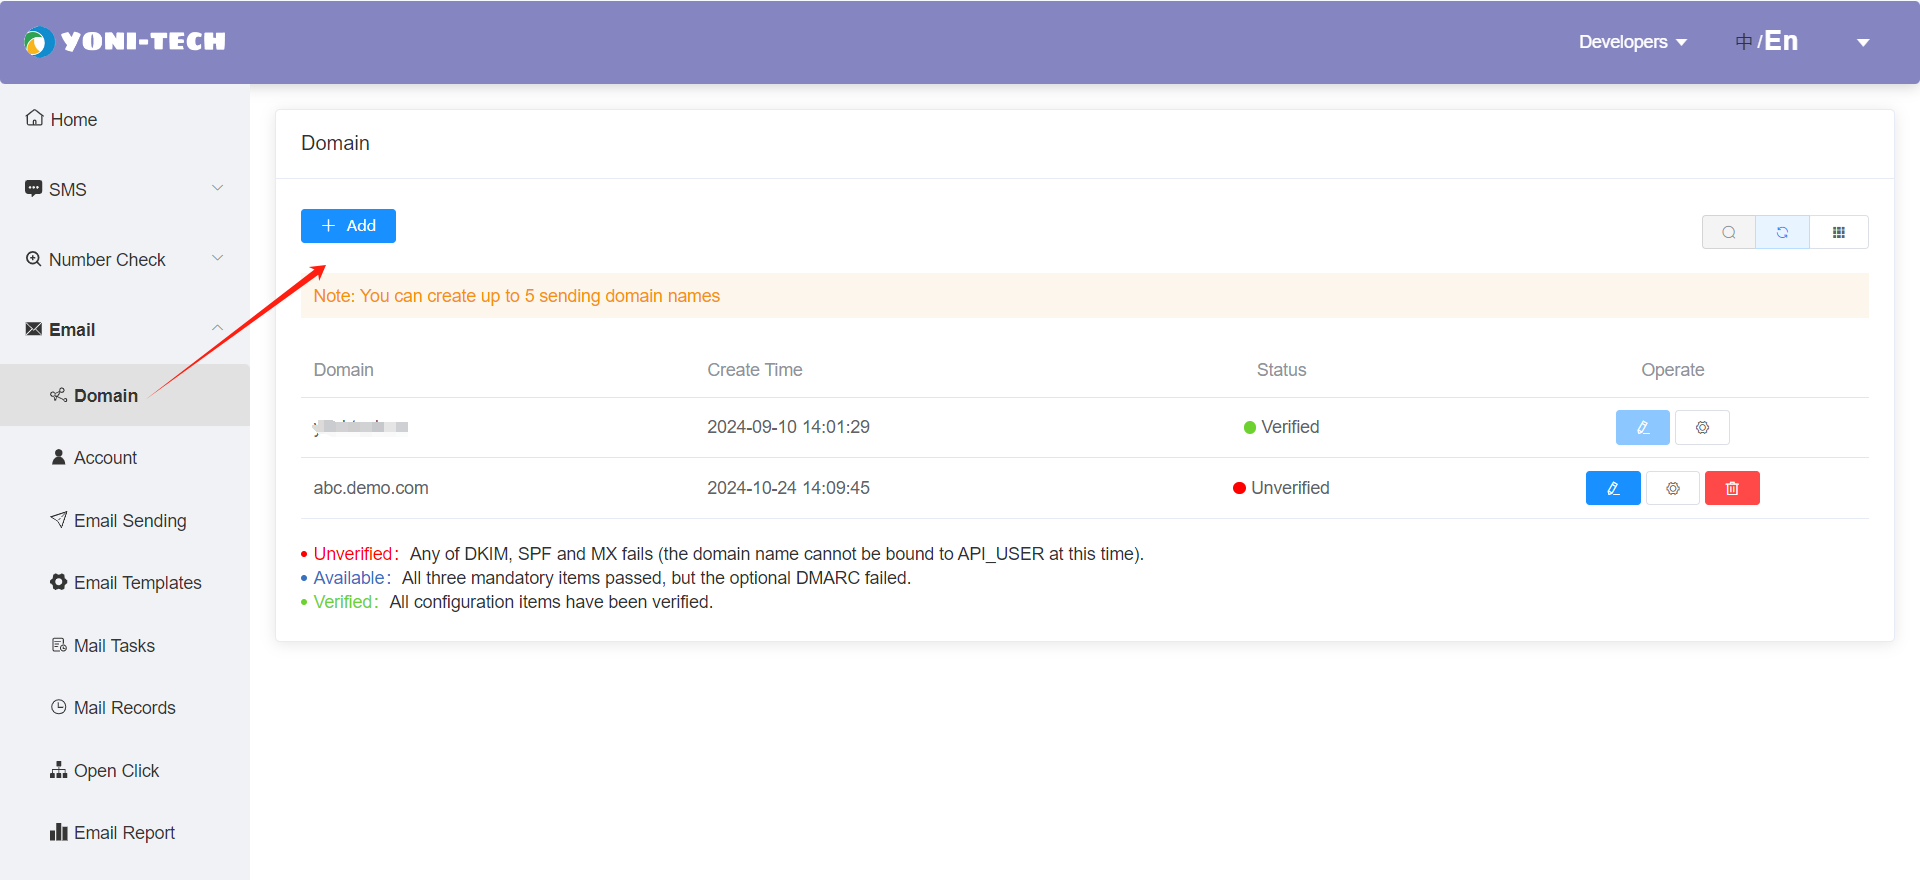
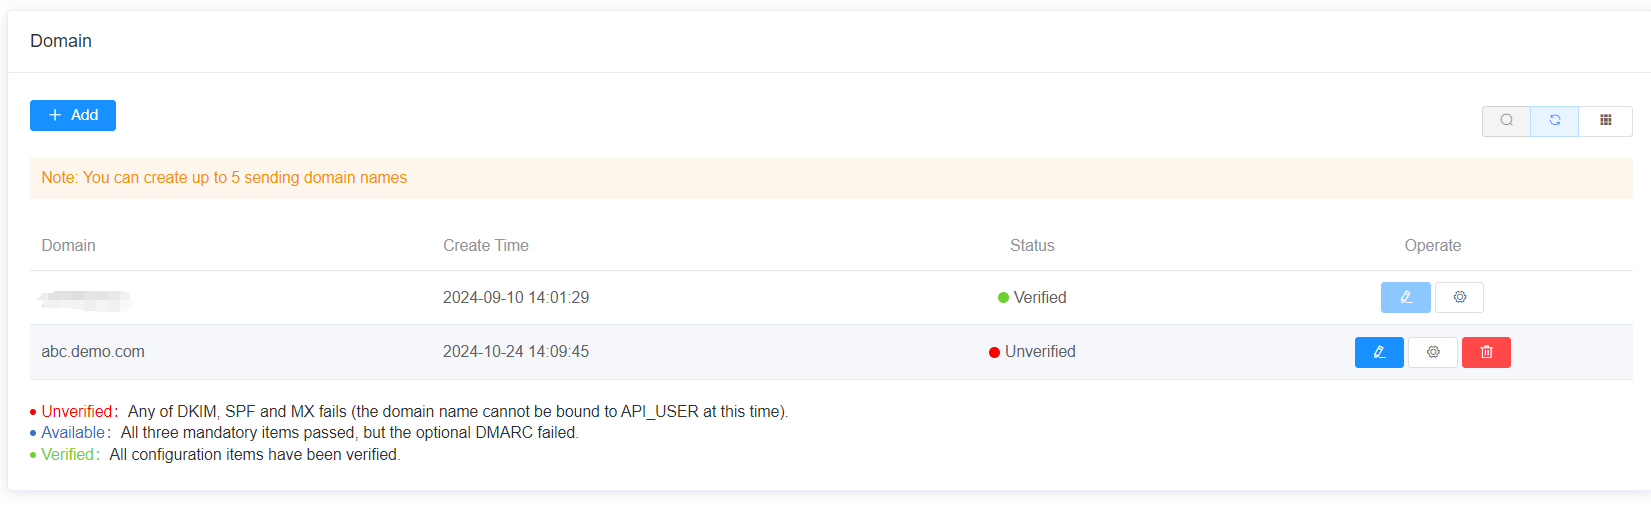
- In the web interface select Email->Domain and then click on Add
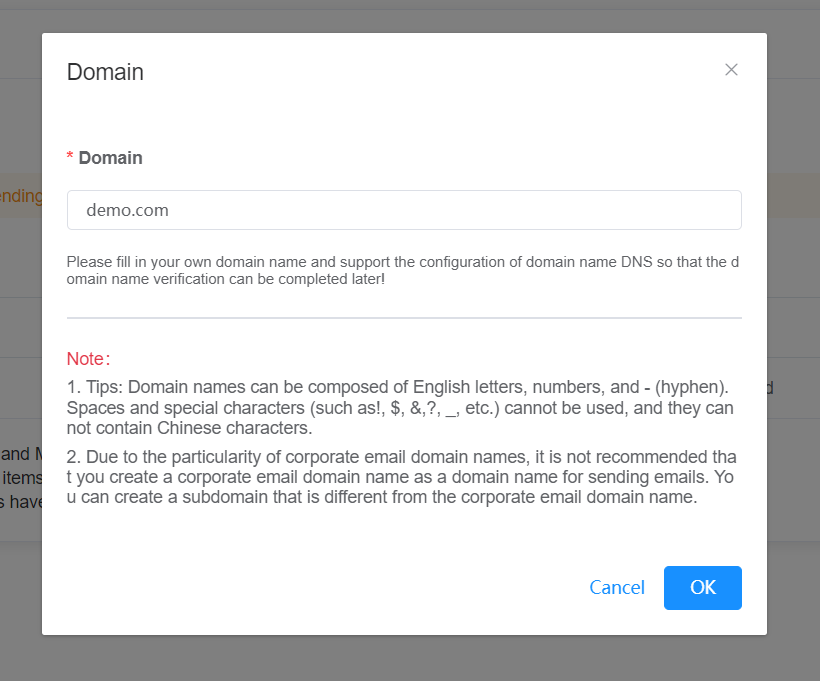
- Enter a Domain name. You do not need to add a prefix, for example, https:// or www then and click on OK
Sending domain configure
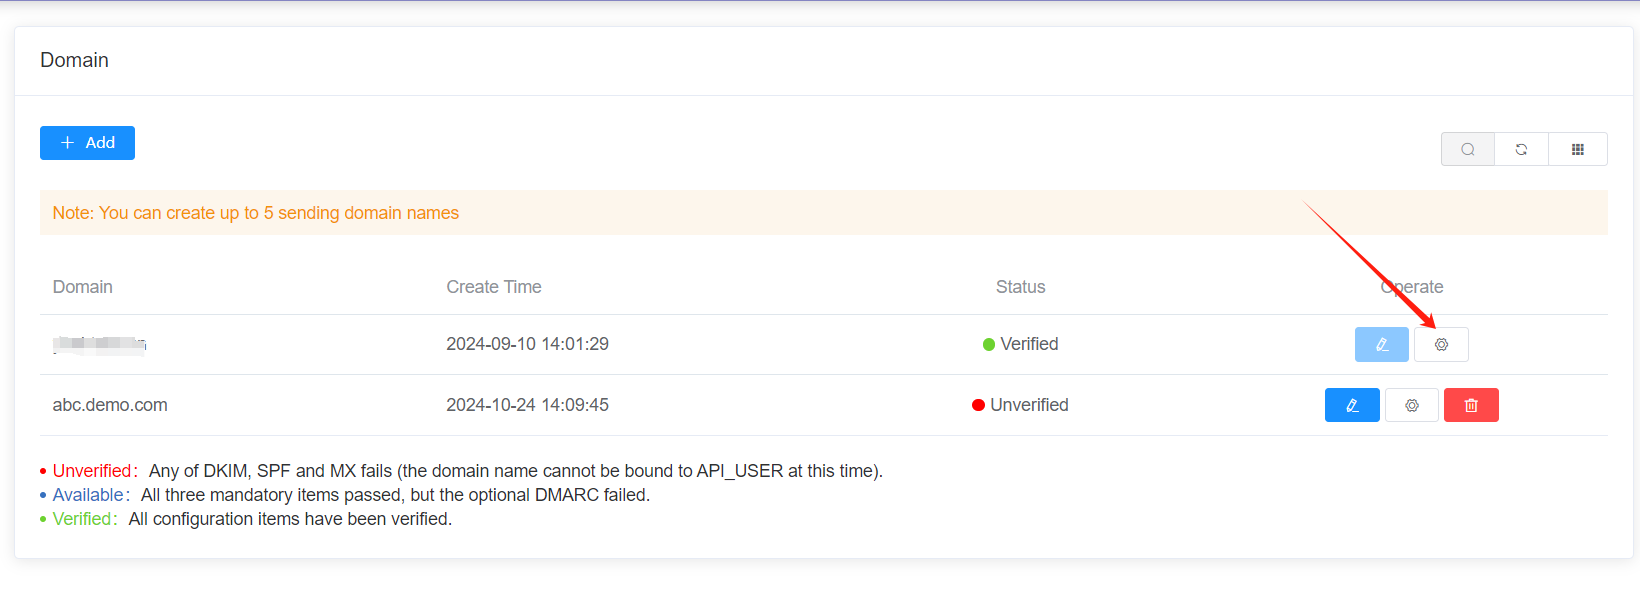
1、 Click this button
2、Copy or download configuration file
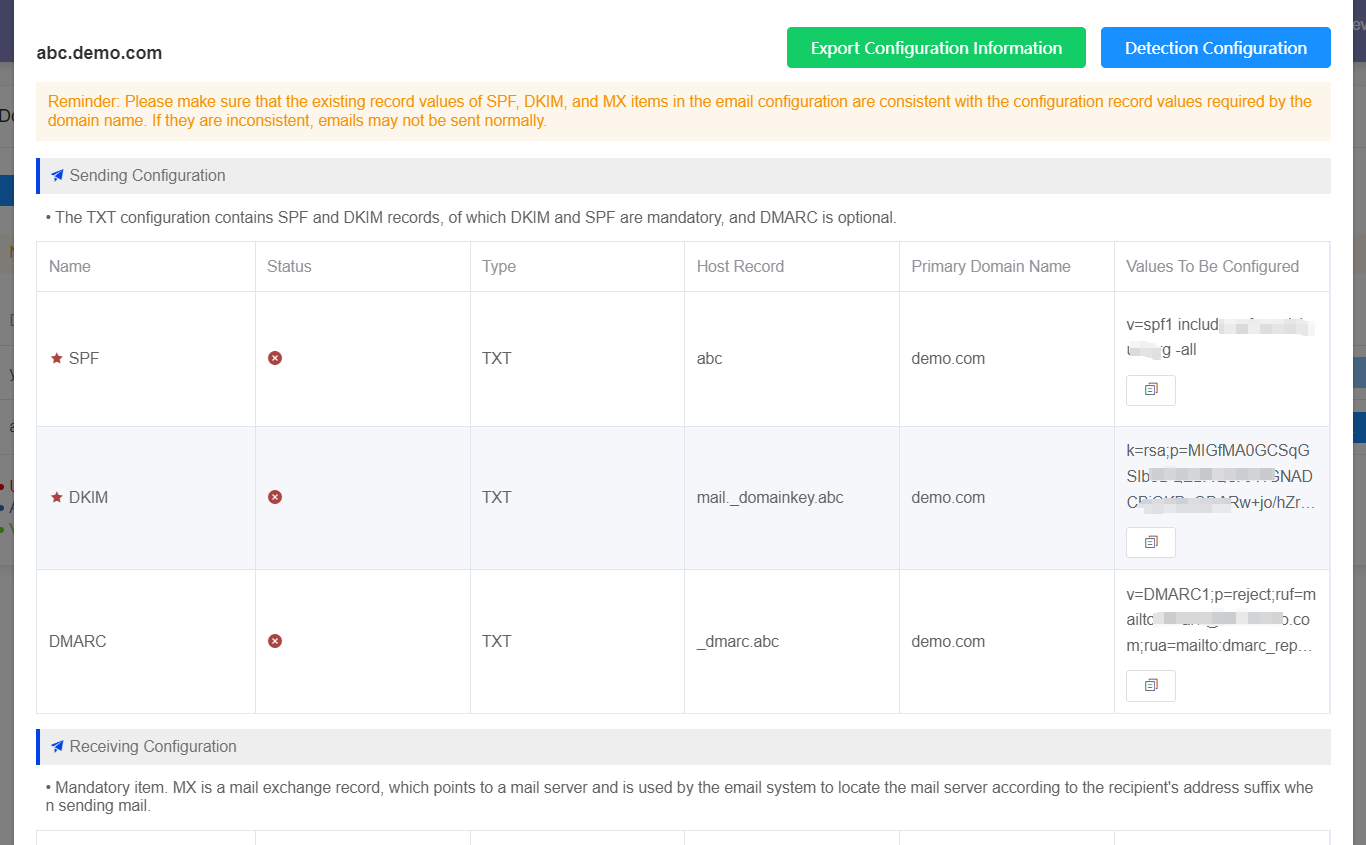
The configuration of sending domain name includes SPF, dkim, MX and dmarc. Among them, SPF, dkim and MX are required, dmarc is optional.
- SPF wiki explanation
SPF is a DNS record type proposed to prevent spam, which is used to register all IP addresses of outgoing mail owned by a domain name.
- MX
MX is a mail exchange record, which points to a mail server. It is used to locate the mail server according to the address suffix of the recipient when the e-mail system sends mail
- DKIM wiki explanation
Dkim is an important technical means to prevent fraudulent e-mail. Usually, the sender will insert dkim signature and electronic signature information into the header of e-mail, while the receiver will get the public key through DNS query and then verify it. It is recommended to configure, especially for users with more foreign domains
- DMARC
The main purpose of "dmarc" protocol is to identify and intercept fraudulent mail. After the configuration is passed, the platform will use the current domain name as the domain name suffix of from to deliver the mail. So as to reduce the interception of mail service providers, improve the credibility of mail, improve the rate of box.
There are three states after domain configuration
- Unverified: any one of the required items (SPF, dkim and MX) failed (Thus domain cannot bind API account)
- Usable : all the three required items have passed the verification, and the optional items have not passed the verification.
- Verified: all configuration items have been verified.
After all records are configured, it may take 10-30 minutes for the DNS to take effect
You need to set different domains (domains with different primary domains) for trigger mail and bulk mail, so as to avoid sharing one sending domain , which will restrict both types of mail and prevent trigger mail from being delivered in time
How to configure domain on DNS resolution platform
We will introduce how the most common DNS service providers configure domain names.
First, please confirm that you have created your own sending domain in the background of YoniTech.
DNSPOD
1、Login to your DNSPOD account,and enter the [My Domains] page of domain name management.
2、Click [Add Record] and a new record box will appear, as shown in the figure below.
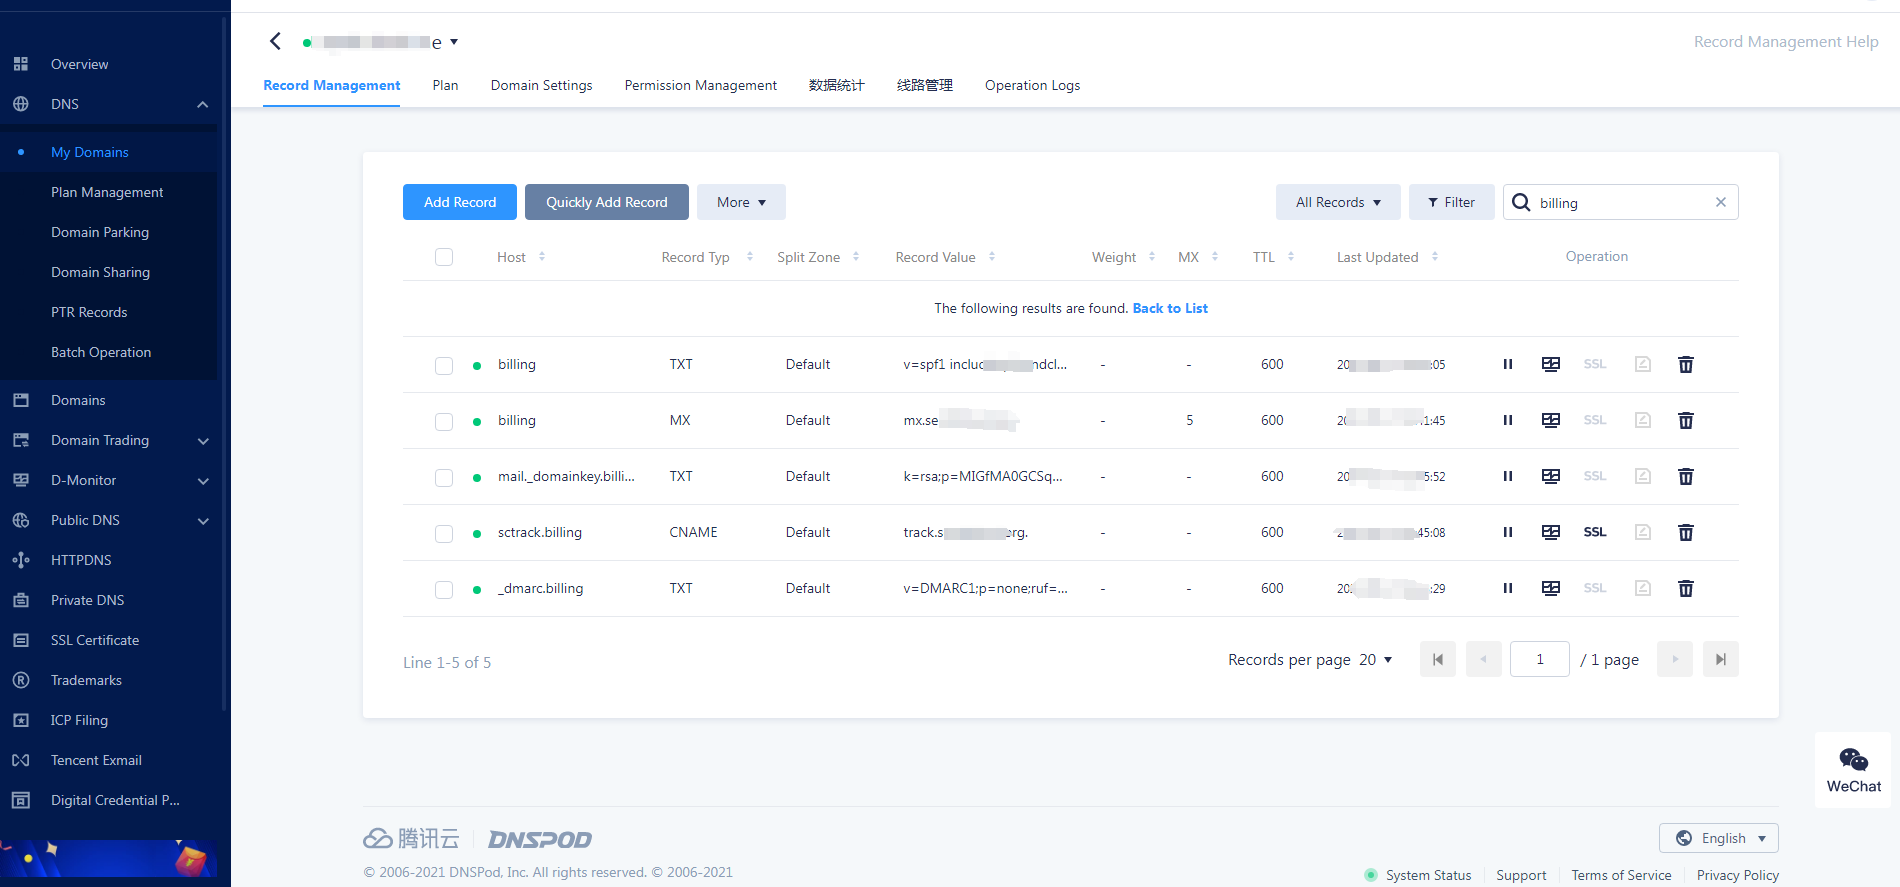
3、Fill in "host record", "record type" and "record value" and save them.
4、You need to fill in 3 TXT records and 1 MX record. Please ensure that the information provided by SendCloud is completely consistent.
Detect configuration information
If you have completed the above configuration then you can click this button
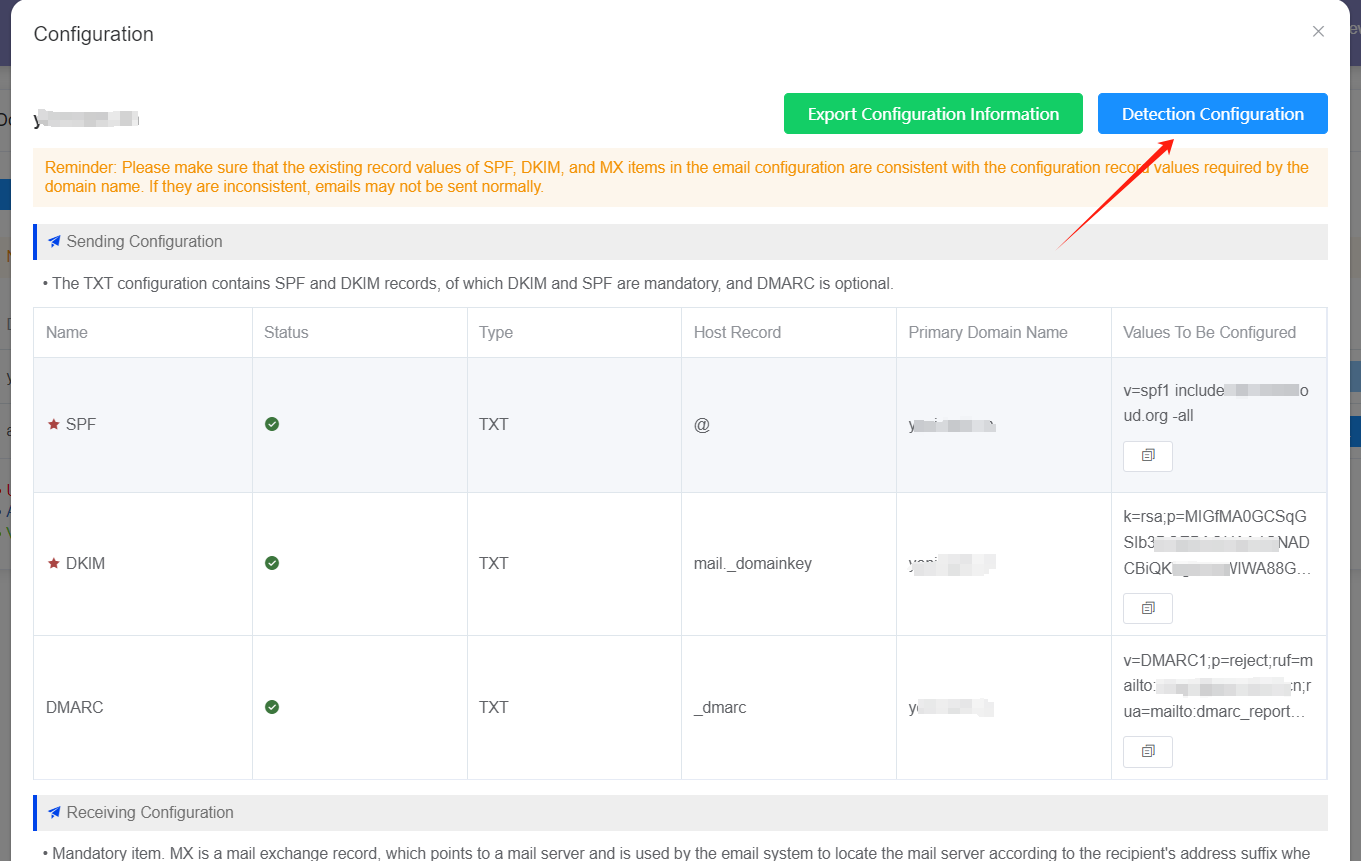
Here you can see the status of each item,then domain status is also updated
There are three states after domain configuration
- Unverified: any one of the required items (SPF, dkim and MX) failed (This domain cannot bind API account).
- Usable : all the three required items have passed the verification, and the optional items have not passed the verification.
- Verified : all configuration items have been verified.